
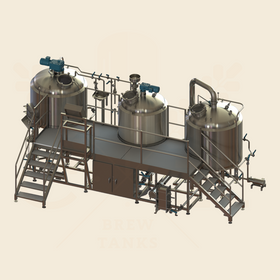


Introduction: Setting Up a Commercial Brewery

Installing commercial brewery equipment is a complex process that requires careful planning and a multidisciplinary approach. It's not merely about connecting a few pieces of equipment; it's about designing and building a fully functional brewing environment. This involves electrical work, plumbing, gas hookups, and construction work tailored to the specific needs of the brewing operations.
The overall process typically involves the following stages:
- Needs Assessment: Determining the specific requirements for the brewery based on the size, capacity, and the type of beverages to be brewed.
- Design and Planning: Creating blueprints and layout plans to ensure that all components fit within the space and comply with local regulations.
- Permitting and Compliance: Acquiring necessary permits and ensuring adherence to local, state, and federal regulations.
- Construction and Installation: The hands-on phase where the equipment is physically installed, and all necessary connections are made.
- Testing and Commissioning: Ensuring all systems are working correctly and efficiently before full-scale production begins.
Now, let's break down some of the essential aspects:
1. Electrical Hookups
- Voltage Requirements: Identify the voltage and amperage needs for every piece of equipment, including brewhouses, cellar cooling equipment, pumps, and control panels.
- Wiring and Circuits: Use proper gauge wires, and ensure breakers are rated for the appropriate amperage. Follow the National Electrical Code (NEC) requirements.
- Grounding: Implement correct grounding for all electrical equipment, preventing potential electrical faults and shock hazards.
- Backup Systems: Consider installing a backup generator to prevent downtime during power outages.
2. Plumbing
- Material Selection: The choice of materials like stainless steel 316L or specialized plastics is essential, as these must be resistant to mild acids and caustics used in the CIP process. Avoiding corrosion and chemical degradation ensures both safety and product quality.
- Water Filtration: Depending on the water source, proper filtration removes impurities that could affect taste or corrode equipment.
- Pressure and Flow Control: Consideration of flow rates, especially during the CIP process, is essential for effective cleaning and sanitizing without damaging equipment.
- Temperature Control: Water heaters and chillers should be configured to meet specific temperature requirements for different phases of brewing and cleaning.
- Passivation: This process involves treating stainless steel with acid (usually nitric or citric) to remove free iron from the surface. By doing this, the "passive" (non-reactive) chromium oxide layer is enhanced, giving the steel its famed corrosion resistance.
- CIP Systems Integration: Design the CIP system for accessibility, ease of use, and efficiency. Including features like automated control systems can streamline operations.
3. Drainage
- Material Resistance: Drainage systems must also be constructed of materials resistant to acids and caustics. Stainless steel or approved plastic piping could be suitable here, depending on local regulations.
- Sloping Floors: To facilitate drainage, ensure that floors slope at the correct angle towards the drains, usually around 1-2%.
- Wastewater Treatment: Determine if pH balancing or other treatment is required before discharge, especially after the CIP process. This helps comply with local wastewater regulations.
- Grease and Solids Traps: Placement and size need to be planned, as large solids or excessive oils could lead to clogging, and nobody wants that headache.
- Regular Maintenance: Regular inspection and cleaning will prevent build-up and potential damage from the harsh chemicals used in CIP.
4. Ventilation
- Exhaust Hoods: Select the proper size and type of exhaust hoods to efficiently remove steam, odors, and volatile organic compounds.
- Specific Equipment Vent Stacks: Plan to install vent stacks for boilers, kettles, and gas-fired equipment with enclosed combustion chambers.
- Air Exchange Systems: Design an HVAC system to maintain indoor air quality, temperature, and humidity control.
- Make-up Air: Include make-up air systems to replace the exhausted air, ensuring a balanced indoor environment.
- Ductwork and Maintenance: Regularly inspect and clean ductwork to maintain efficiency and safety.
5. Gas Connections
- Fuel Selection: Evaluate the energy efficiency, availability, and cost of natural gas versus propane.
- Piping and Valves: Install gas lines using approved materials, with shut-off valves accessible for safety.
- Venting: Ensure proper venting of gas appliances according to local building codes.
- Inspection: Schedule inspections by the appropriate regulatory authority to certify the installation.
6. Construction-Related Topics
- Insulation: Consider insulation materials and methods for walls, roofs, and piping to minimize energy loss.
- Flooring and Wall Materials: Choose durable, non-slip, and chemical-resistant flooring. Walls should be moisture-resistant.
- Lighting: Design lighting layout for task-specific areas, considering energy-efficient LED options.
- Space Planning: Allocate sufficient space for future expansions or modifications, such as new tanks or bottling lines.
- Accessibility and Safety: Ensure clear pathways and adhere to ADA requirements and OSHA regulations for safety.
By attending to these details, the commercial brewery installation becomes a well-orchestrated process where each component functions seamlessly with the others. It's like building a symphony of flavors in your beer, but instead of malt and hops, it's wires, pipes, and concrete.